For this system, which will eventually be a server called verynice, I made a VM with 256MB of RAM and 640MB of disk.
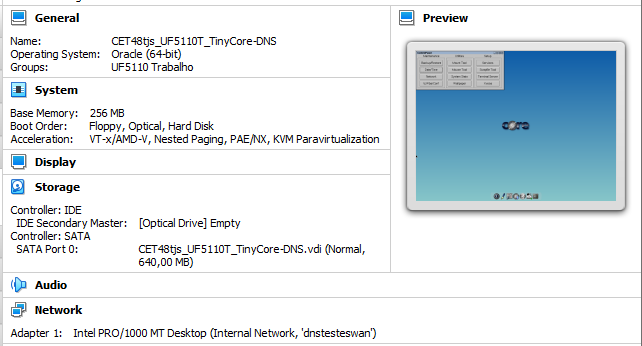
[TinyCore]1 is a very special Linux installation, destined for systems with very few resources. I’ll use the Deluxe version, CorePlus, with leather seats, GUI and possibility of disk installation, but there are leaner flavors of CoreLinux that will cheerfully boot from a 128MB flashdrive and load themselves to a RAMdrive at startup.
It works in a very particular way because the core system is completely separated from the applications and settings and these are only applied at the following boot if they are explicitly stored.
Very few concessions are made to convenience and user-friendliness, the default shell (busybox)2 is extremely simplified in comparison to a normal Linux distribution and management utilities are just like UNIX/Linux ten years ago.
Installation
Download from TinyCore’s main site the CorePlus installer
Place the ISO on the VM’s virtual optical drive and start it.
Pick the default option, FLWM topside

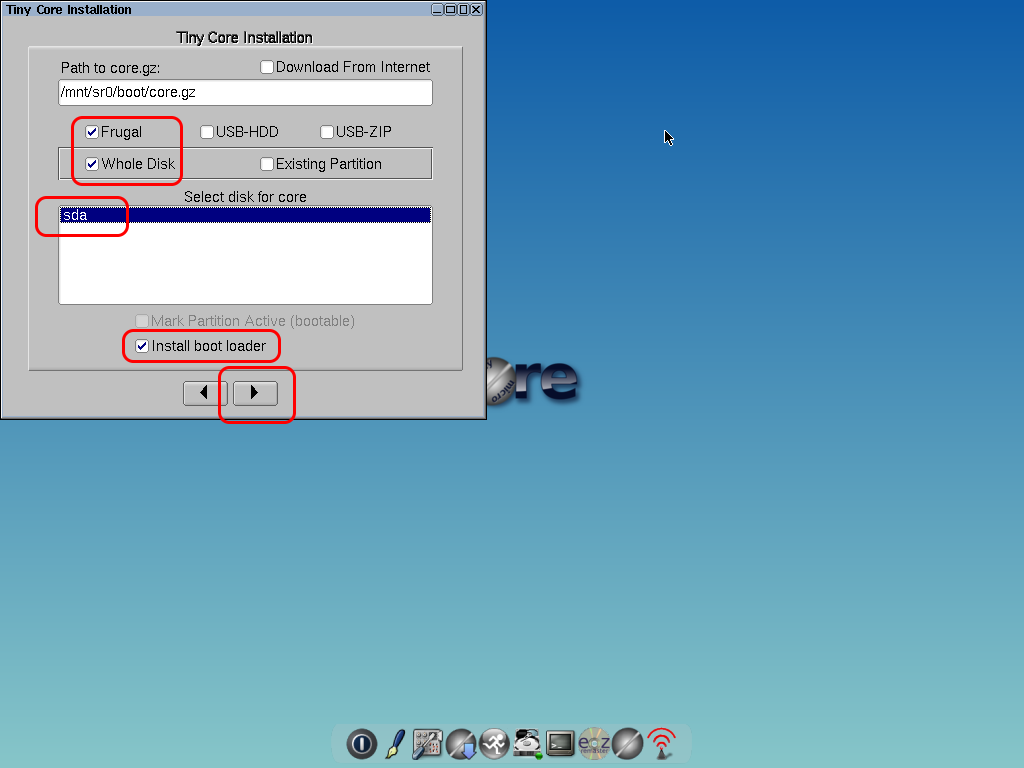
At the dock on the bottom of the screen, open the tc-install3 application.

Pick Frugal, Whole disk, and then, sda. Confirm that Install boot loader is enabled. Click on >
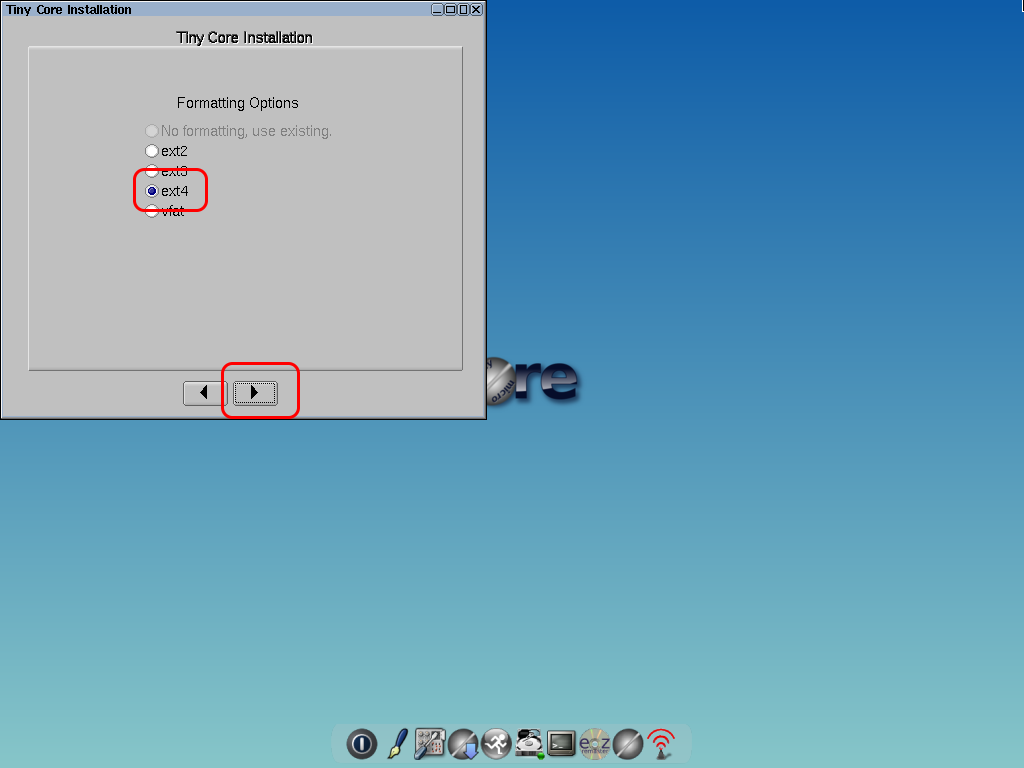
Formatting Options: ext4 >
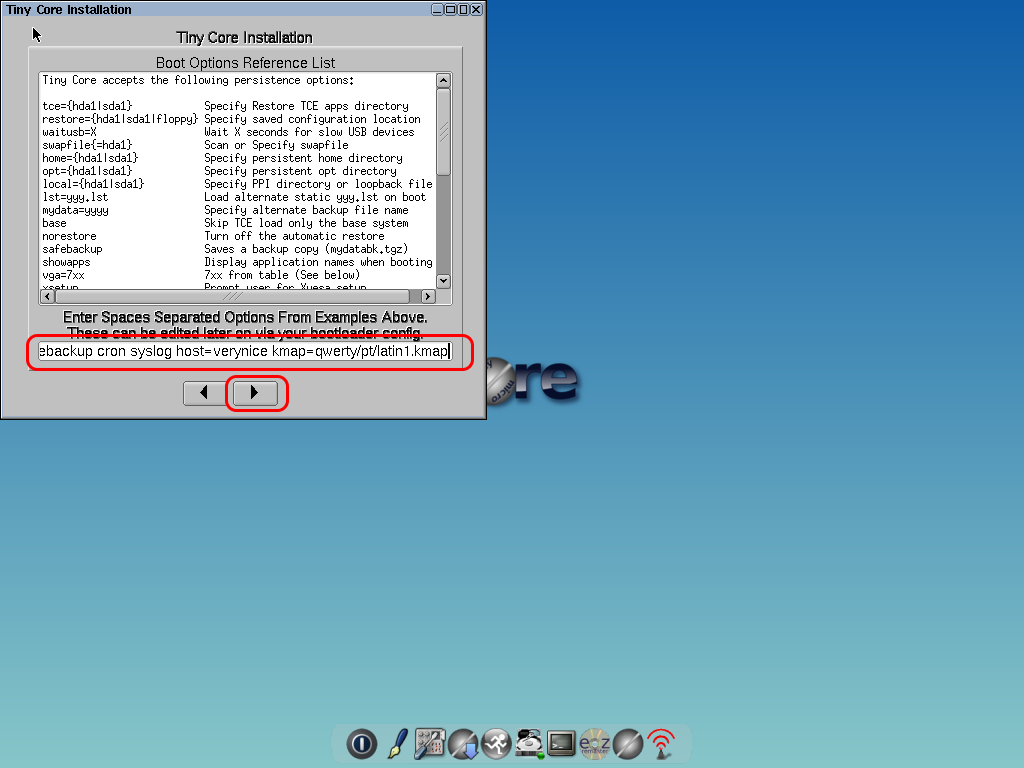
Boot options to add to the installer (check the on-screen list, or Chapter 10 of the Official Tiny Core Linux book, Into the Core):
tce=sda1 home=sda1 opt=sda1 nodhcp showapps safebackup cron syslog host=verynice kmap=qwerty/pt-latin1.kmap
(Change the hostname and keymap to something more appropriate for you, obviously)
=, « and / will be on different keys if that’s not your actual layout.
Click on >
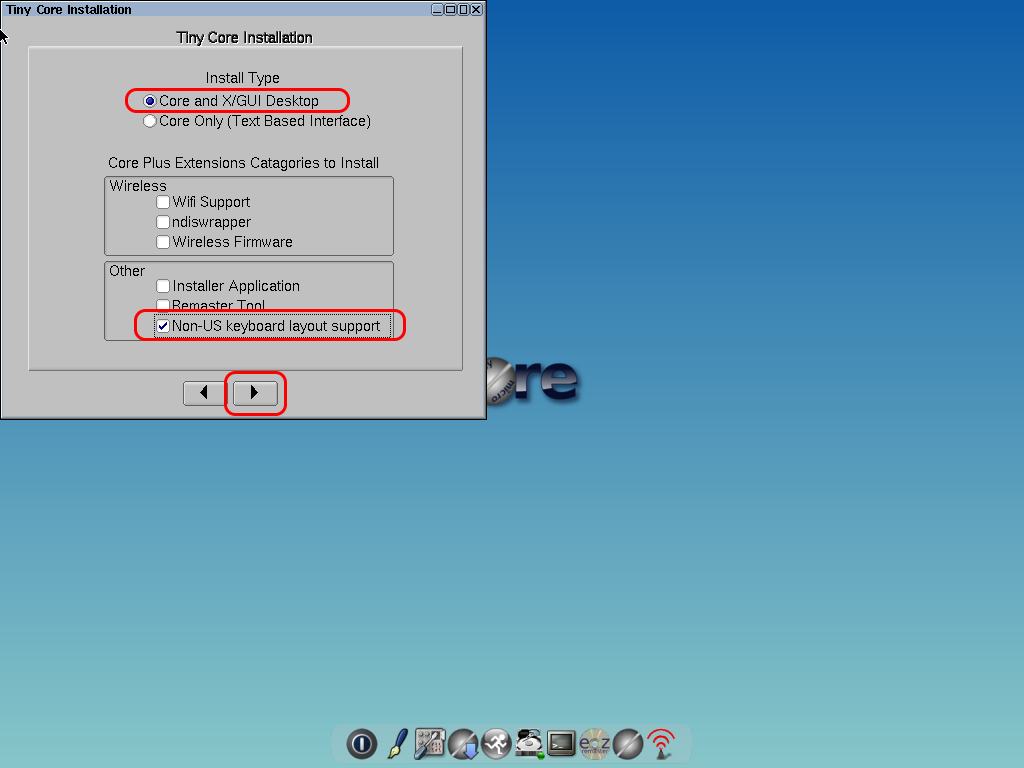
Install type
I chose Core and X/GUI Desktop but when following this guide, you may not need the GUI and be able to choose Core Only
The only extension to install right now is Non-US keyboard layout support (if you need it)
Click on >
Actually, after having CoreLinux installed and the network configured, this extension can be installed quite easily from the extension manager, so it’s really not required to use the CorePlus installer to have international keymaps, and a lighter installer would be enough. But this is the most general case.
The same may not be true for support for Wi-Fi cards, which is also chosen on this panel but which I haven’t tested.
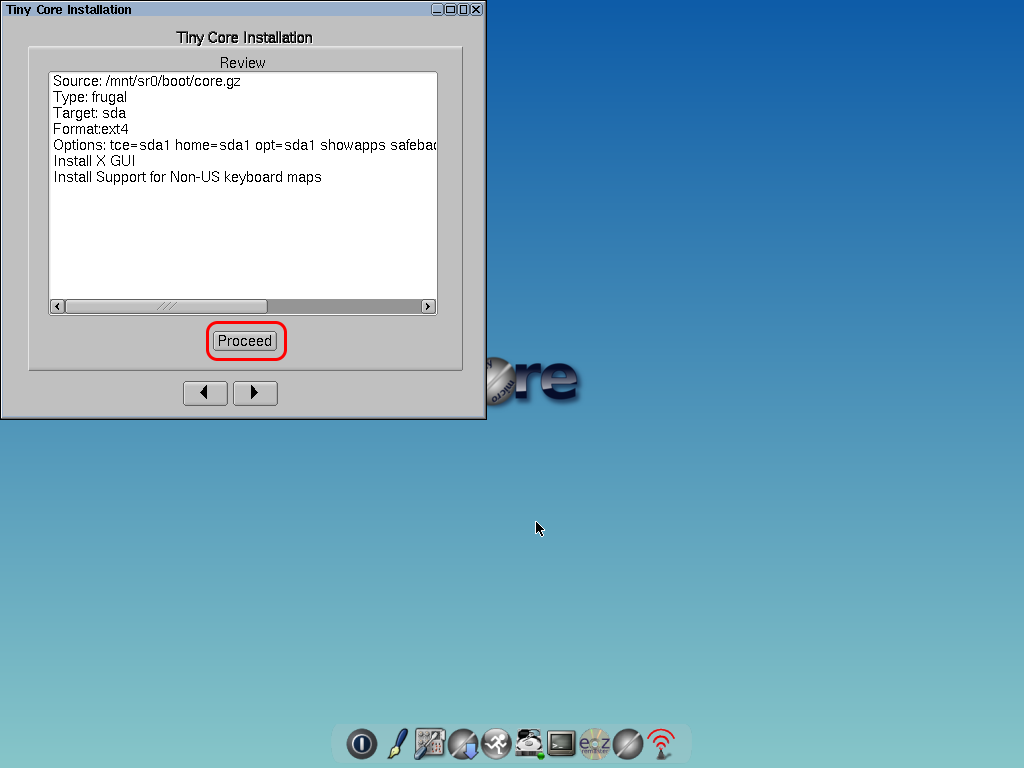
Review the settings and click Proceed
Click on the Exit icon on the dock, pick Shutdown, OK
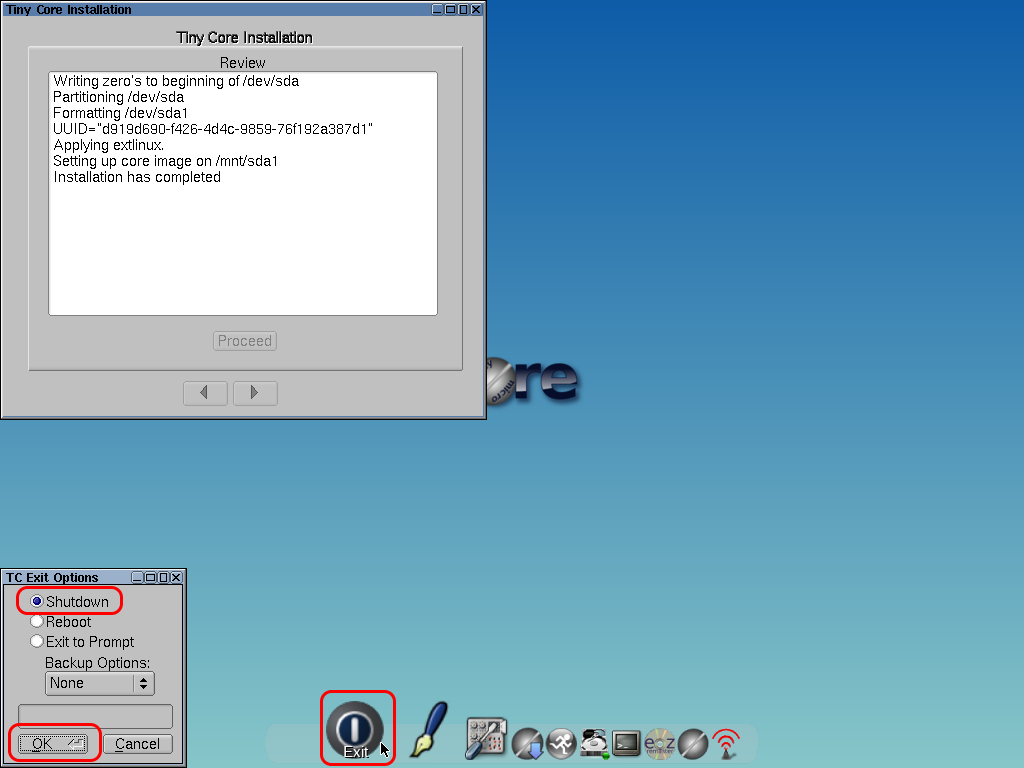
When the installtion completes, remove the ISO from the optical drive and reboot the VM.
Initial Settings
Changing boot options
To change the boot options, edit /mnt/sda1/tce/boot/extlinux/extlinux.conf and make your changes to the APPEND line.
Non-US keyboard
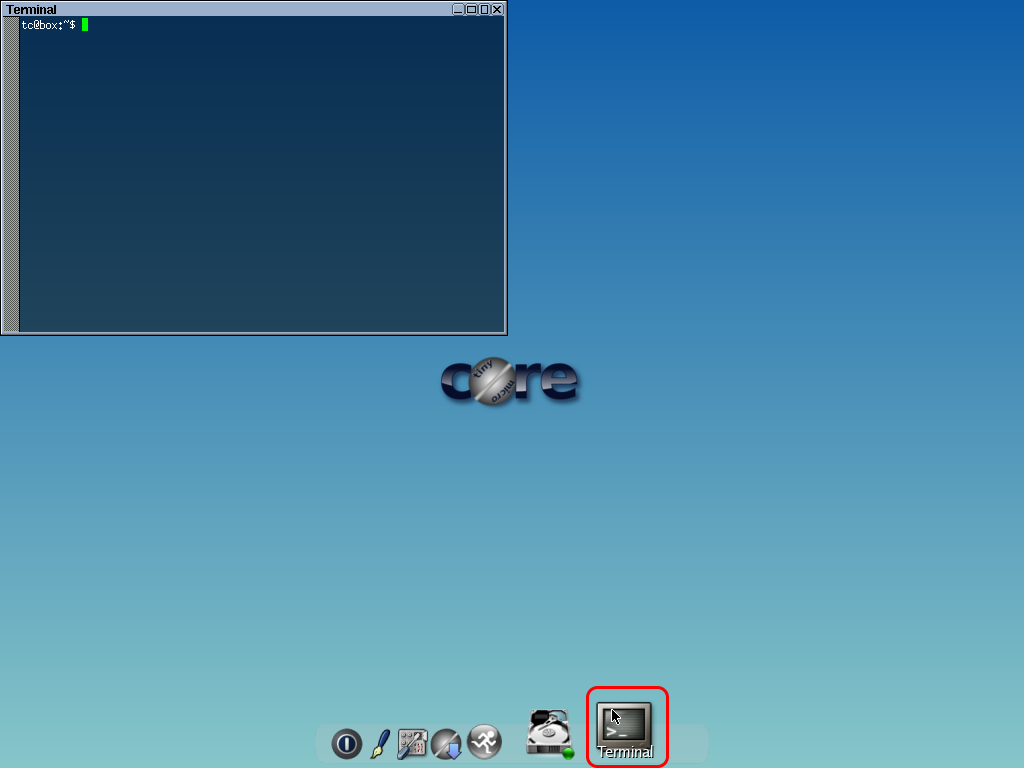
Open a terminal and test a key that’s specific to the layout you specified; if the result isn’t what you expected (the kmap boot option isn’t being followed), use the commands:
|
|
Set up Permanence
Without this step, TinyCoreLinux will not automatically save the changes we make to the configuration because after each restart, all settings are lost except those that we tell it to save (which can be both good, or bad).
The steps below configure the automatic saving of the existing settings on system shutdown using the script that is run automatically by the system before shutting down:
|
|
Beneath the #put user shutdown commands here line, add:
|
|
Save and exit. The command to force the recording of this change is, of course,
|
|
Change the default user’s (tc) password
|
|
Pick a password.
Add a config file to the Permanence list
To save a configuration file, like the password file, after a restart (giving it permanence), the file path to save, minus the leading /, has to be placed in /opt/.filetool.lst
|
|
Network
To configure a network interface in a flavor of CoreLinux with a GUI, use the command sudo network in a terminal window (the following values are just for illustrative purposes):
Interface: eth0
DHCP Broadcast: no
IP Address: 10.123.130.6
Net mask: 255.255.255.248
Broadcast: 10.123.130.7
Gateway: 10.123.130.1
NameServers: 1.1.1.1, 8.8.8.8
Save Configuration: yes
Apply

Test with ping 1.1.1.1
Confirm the settings with cat /opt/eth0.sh
#!/bin/sh
pkill udhcpc
ifconfig eth0 10.123.130.6 netmask 255.255.255.248 broadcast 10.123.130.7 up
route add default gw 10.123.130.1
echo nameserver 1.1.1.1 > /etc/resolv.conf
echo nameserver 8.8.8.8 >> /etc/resolv.conf
To configure the network without having access to the GUI, simply copy the above information to
/opt/eth0.shConfirm that
/opt/eth0.sh has been added to the Permanence with:
|
|
opt/eth0.sh
If it’s not,
|
|
Aliases
The aliases of the default user (tc) are in ~/.ashrc. I added these aliases that I found useful:
|
|
And it would be nice to have those aliases (as well as others, like ll='ls -l' and especially rm='rm -i') on a rootshell; copy the necessary files to /root and let CoreLinux know that we want to save the contents of the /root folder between boots as well:
|
|
Set the Time Zone information
Source
Confirm that we are in the user’s folder: cd ~
Make sure that we can connect to the WAN (e.g, ping 1.1.1.1)
The tce-fetch.sh script downloads an extension without installing it. In this case we want the tzdata.tcz extension (Time Zone data.TCextension Zipped)
|
|
CoreLinux can mount extensions directly for reading (as a matter of fact, that how it “installs” an extension). Create a folder and mount:
|
|
Copy the desired Timezone information to the default location, /etc/localtime
|
|
Make the setting permanent:
|
|
Remote access with OpenSSH
Source
Make sure that we can connect to the WAN (e.g, ping 1.1.1.1)
The tce-load -wi permanently installs an extension:
|
|
Create the OpenSSH service’s configuration by copying the default configuration provided with the extension:
|
|
Start the service with the extension-supplied init script:
|
|
Check the service with:
|
|
Tcp	0	0  0.0.0.0:22		0.0.0.0:*		LISTEN
1470/sshd
First access
The default sshd_config mandates a password-protected default user, so if the tc user’s password is not configured yet it’s necessary to do so now (host-based auth or public/private keypairs can be configured, but only after editing sshd_config)
|
|
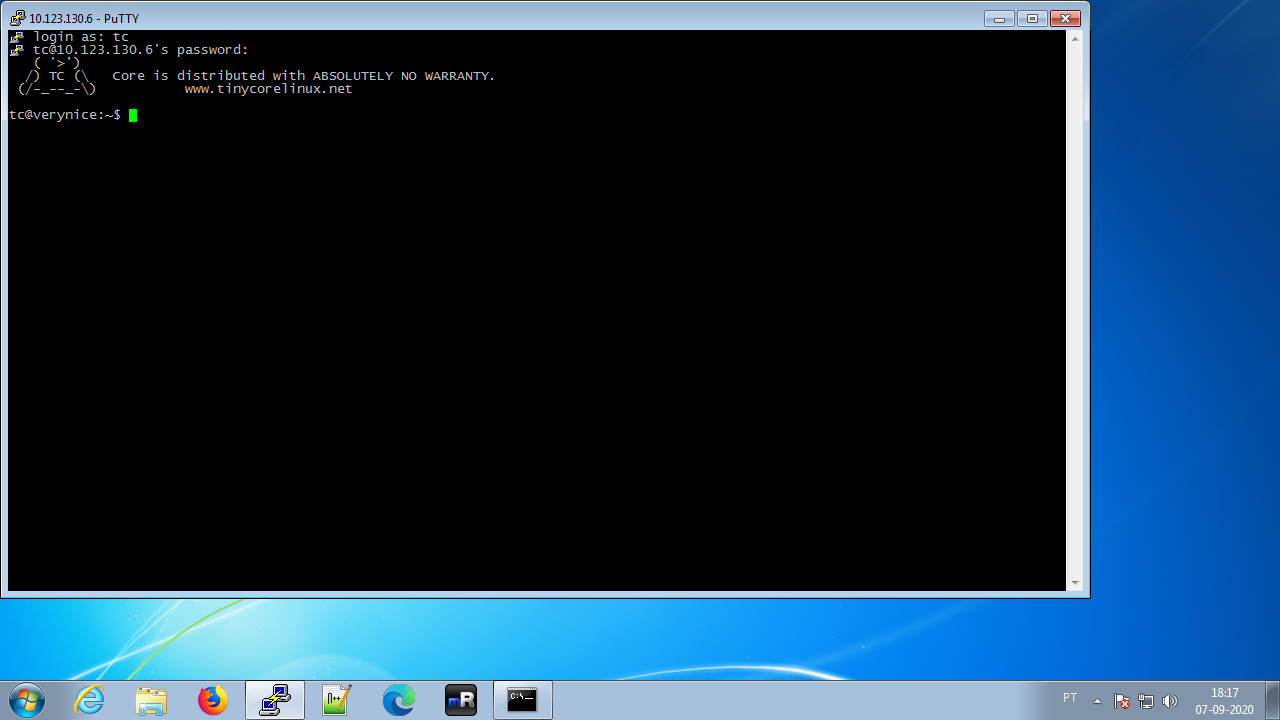
Test the connection using an SSH client (like PuTTY on Windows):
Make sure that SSH settings are saved for the next boot
|
|
Setup the service to start on system boot
Nostalgia is a lady dog… It’s done the pre-SystemD way:
|
|
(Uuuhhh… no. SystemD service management is vastly superior to fiddling with shell scripts and dependencies by hand. But it would probably be larger than the rest of CoreLinux itself)
Install a text editor (vim)
Call up the text-mode application manager:
|
|
S)earch
Enter starting chars of desired extension, e.g. abi:
Write vim, Enter
tce - Tiny Core Extension browser
         1. gvim-base.tcz
         2. gvim-doc.tcz
         3. gvim.tcz
         4. gvim-tutor.tcz
         5. vim-locale.tcz
         6. vim.tcz
Enter selection ( 1 - 6 ) or (q)uit:
6
The About info of the extension is shown; q to go back and show the menu again:
A)bout I)nstall O)nDemand D)epends T)ree F)iles siZ)e L)ist S)earch P)rovides K)eywords or Q)uit:
i
vim.tcz.dep OK
Downloading: gvim-base.tcz
Connecting to repo.tinycorelinux.net (89.22.99.37:80)
saving to 'gvim-base.tcz'
gvim-base.tcz        100% |************************************************************************************| 8036k  0:00:00 ETA
'gvim-base.tcz' saved
gvim-base.tcz: OK
Downloading: ncursesw.tcz
Connecting to repo.tinycorelinux.net (89.22.99.37:80)
saving to 'ncursesw.tcz'
ncursesw.tcz         100% |************************************************************************************|  212k  0:00:00 ETA
'ncursesw.tcz' saved
ncursesw.tcz: OK
Downloading: vim.tcz
Connecting to repo.tinycorelinux.net (89.22.99.37:80)
saving to 'vim.tcz'
vim.tcz              100% |************************************************************************************| 1432k  0:00:00 ETA
'vim.tcz' saved
vim.tcz: OK
 vim.tcz
A)bout I)nstall O)nDemand D)epends T)ree F)iles siZ)e L)ist S)earch P)rovides K)eywords or Q)uit:
Q to exit; S, P, or K, to find more extensions to install. For example, coreutils.tcz installs the most-used GNU/POSIX commands in their full versions, replacing the ones integrated on busybox, and bash.tcz replaces busybox itself (but since TinyCore makes no concession to user-friendliness, we have to edit /etc/passwd and change the user’s login shell, set /etc/passwd to be permanent, and roll the backup)
Setting up vim
|
|
Set the file up with the desired options (and since it’s located in /home/tc/, the boot options we provided, specifically home=sda1, will automatically make the file permanent).
Suggestions for a .vimrc can be found on the Dotfiles page.
After customizing to our taste, having the same options when editing a file as root would be nice. To accomplish that, copy the .vimrc to root’s home folder:
|
|
(Check the Aliases section for how to add /root to the Permanence, if it’s not already there)
NTP client
If the system clock isn’t correct the communication between any local services and WAN servers can be refused by the latter. And on a VirtualBox VM without GuestAdditions, the clock will be wrong most of the time.
Despite the existence of a chrony extension for TinyCore, I used a very basic NTP client4, because I was interested in as lean a system as possible.
|
|
Downloading: ntpclient.tcz
Connecting to repo.tinycorelinux.net (89.22.99.37:80)
saving to 'ntpclient.tcz'
ntpclient.tcz        100% |********************************| 12288  0:00:00 ETA
'ntpclient.tcz' saved
ntpclient.tcz: OK
Configure the client
Place on /opt/bootlocal.sh three instructions with very different tasks:
1) Update the time while booting up5
If we don’t have DNS available at this stage, we’ll need to use straight IP addresses instead of hostnames, so we can’t use a pool address. My recommendation in that case is to ask the time to your country’s Official Time servers (the example uses the addresses of the Portuguese Official Time servers)5
|
|
2) Update the Real-Time Clock (RTC)
TinyCore, until told otherwise, will ignore the NTP time and will always get the time from the hardware clock, which in the case of VirtualBox without Guest Additions, can’t ask the VM host for the current time and boots with the same time the VM was last turned off.
So after we receive the system time from an NTP server, we must update the hardware clock with hwclock -w
|
|
3) Correct any time drift
Then we need to ensure that the clock won’t drift from the correct time while the system is up, by starting a process that checks the time at regular intervals6
|
|
From a cold boot, these settings work well.
Final thoughts
TinyCoreLinux is very small, but this has its costs.
Everything must be configured, and everything has to be defined as persistent.
It behaves more like a container than a regular system install; it has good company, because AlpineLinux works under the same principles, and is also very popular as a container base (being the default container base on Docker) and on embedded systems.
However, it seems to me that Tinycore is beginning to be too much work for what resources it saves. Usually we’re not that desperate any more.
For a really minimalist system, there is an even more reduced version, MicroCoreLinux (or simply Core), without any GUI and just 8MB.
For something that would allow me to be productive quickly, I have high hopes for AlpineLinux, which I’ll try to test very soon.